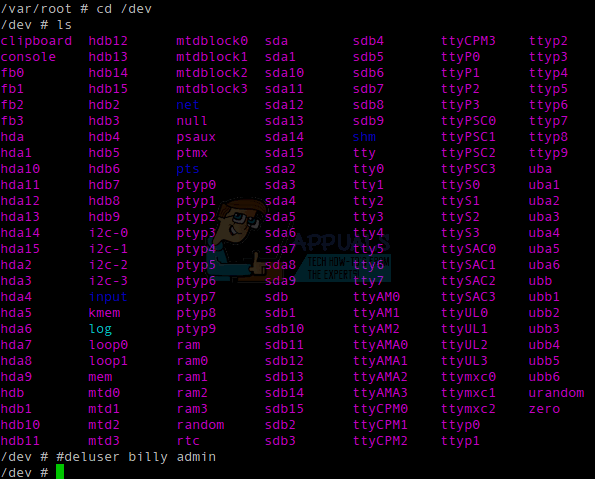
Some system administrators have suggested adding an octothorpe mark (#) before any of these commands. This effectively comments them out, so bash will throw them out if you accidentally push enter before properly typing them. For instance, if you typed #deluser bobby and pushed enter, then nothing would actually happen. Once you’re sure that you have the command properly entered, then you can push the home key, delete the octothorpe mark and push enter.
Method 1: Using deluser to Remove the Group Association
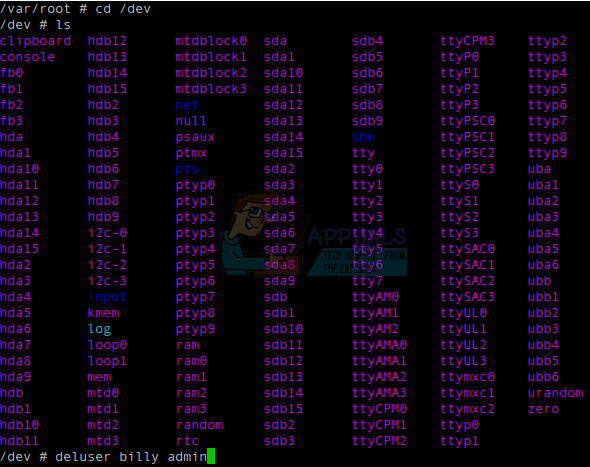
Some system administrators, especially those who previously worked with one of the various BSD distributions, recommended editing the file as root. This is possible to do, but if you make any errors while editing the file you can make the system quite unstable. This is especially true if you make a mistake in regards to the admin group itself. While we will demonstrate how this should be done, using the deluser command is considered a safer option in many cases. From the CLI prompt, which can be either in a graphical terminal or from a virtual console, type the command deluser userName groupName, replacing userName with the name of the user you want to remove the association of and groupName with the name of the group you want to remove the user from. This command will remove the specified user from the group in question, though at the risk of committing an error of omission, it’s best to login in again to view the effect. This will not delete the user itself nor the group, but rather only the association of the two. Be very careful when entering this command, since if you type in a user name and push enter before typing in a group name you will actually delete the user completely. This is where the trick involving an octothorpe comes in handy, and you may wish to apply this any time that you’re editing group policies in Ubuntu, since it can be quite helpful. Say you had wanted to remove a user named billy from the admin group. The command would be as simple as deluser billy admin if you had administrative privileges. Since Ubuntu hashes out the root user, you may actually be running from something other than an elevated shell. If this is the case, then you can instead use sudo deluser billy admin for the same. In either case, though, you’re risking a typo.
If you were to type #deluser billy admin and then push enter, then nothing will happen. You’re forced to look over the command before removing the octothorpe from the beginning of the line. While this might not seem like much to those who are uninitiated, you usually have to issue these commands while doing something unrelated as you might realize that you made some sort of mistake or found that someone had too high of privileges. It’s very easy in that sort of situation to remove an entire user from the system.
This trick prevents this from happening even if you happen to be working on many different things at once, which is particularly true of implementations of the Ubuntu server architecture where you’re more likely to find multiple groups. In those situations, you have nothing but a virtual console to work with.
Method 2: Using the vipw -g or vigr Commands to Edit
If you want to actually edit the file, then you shouldn’t type sudo nano and push enter like you might have been thinking. While Ubuntu will actually allow this command, it’s a bad idea in the same way that editing the sudo configuration file is a bad idea. Type sudo vipw -g and then enter your administration password to open up the file in a text editor. While the name of the command dates to a time when vi was essentially the only rational choice for a Unix text editor, Ubuntu actually defaults to nano on a majority of systems. If you have vi, emacs or something else configured as your default terminal text editor, however, then it will instead default to this. While it was at one point technically a different command, Ubuntu also provides the vigr command as a symbolic link to vipw, which means you can use sudo vigr -g instead if you’re more used to editing the file in this manner. You can now locate the line that indicates the assignment to a specific group that your user account has and remove it. Don’t remove the entire line. Locate the admin group, or whatever other group is in question, and merely remove the user name and the trailing comma before it. Once you’re satisfied with your changes, which you should look over more than once, hold down Ctrl and push O to save it in nano, or push Esc and then type :wq if you happened instead to load up the vi editor. You could theoretically edit it with a graphical text editor as well, but this isn’t recommended. Once again, you’ll probably need to either logout or even restart the system to make it take full effect on smaller systems, but if the other user attempts to log in immediately after you’ve made these changes, then they should already come into play, even if you’re running an implementation of Ubuntu Server with dozens of different home directories. Users who are currently logged in, however, will continue to operate with their previous privileges until they exit their session.
Ubuntu 18.04 LTS Bionic Beaver Officially Available for Ubuntu, Kubuntu,…How to: Create an Ubuntu Bootable USB on Mac, Windows or UbuntuUbuntu 16.04.5 LTS Released on Heels of Ubuntu 18.04 LTS, Bundles All Past…SOLVED: “Unable to initialize audit layer: Permission denied” bug in libvirt-bin…


