Today we’ll show you how to enable Screen saver on your Android device. Then, we’ll show you how to select what to display on the screen and when the screen saver should start.
Enable Screen Saver
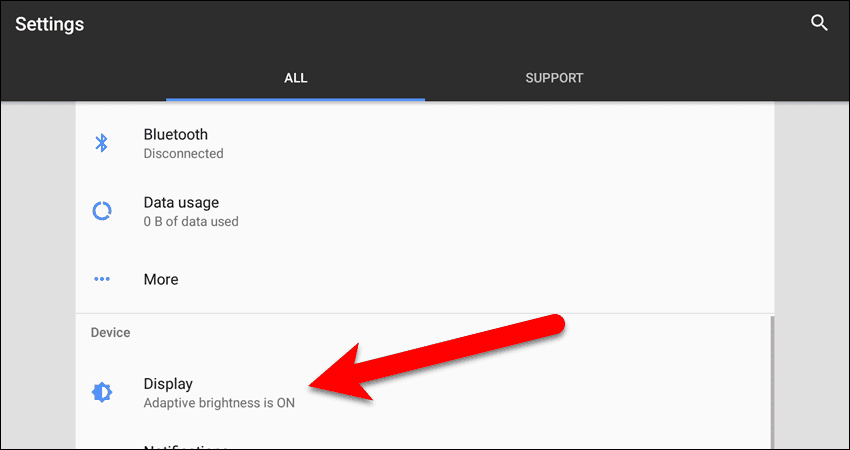
The “Screen saver” feature in Android 7.0 is not enabled by default. It also does not start when you press the power button on your device. It only starts when the device goes to sleep on its own. To enable Screen saver, drag down from the top of your device’s screen and tap the gear icon.
On the “Settings” screen, tap “Display” in the “Device” section.
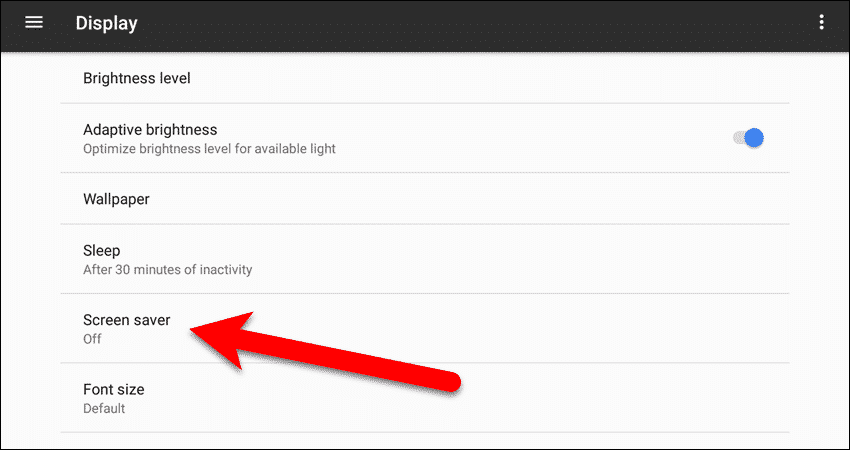
Then, tap “Screen saver” on the “Display” screen.
To turn on the “Screen saver“, tap the slider button on the right side of the screen.
Choose Your Screen Saver
Once you enable Screen saver, you’ll see some default options for what can be displayed while it is running. On our Google Pixel C, we have a choice of a clock, a series of changing colors, “News & Weather“, and “Photos“. We want to display photos from a photo album, so tap on “Photos” in the list.
Other brands of Android devices have different options available for the screen saver. For example, on a Samsung device (shown below), you can choose from “Colors“, “Photo Table“, “Photo frame“, and “Photos“. If you’re using an LG device, your only choices are “Clock” and “Photos“.
If there’s a gear icon to the right of the item, there are settings you can change for that item. For example, we have to choose which photos to use for the screen saver. To do this, we should tap the gear icon to the right of “Photos“. NOTE: For the “Clock“, you can choose whether to display a digital or an analog clock and you can turn night mode on or off (screen dims for easier viewing in a darker room).
For the “Photos” option, you can turn the settings on or off in the “General” section. All three settings in the “General” section are on by default. The “Only use Wifi for data” setting will only load photos from online when your device is connected to a Wi-Fi network. The “Photos fill screen” settings causes each photo to fill the entire screen. The “Animated zoom effect” setting makes the photos zoom in and out slowly.
Display Photos From Google Photos
To display photos from a photo album in Google Photos, select the account you want to use in the “Google Accounts” section. The “Photos” section (below the “Albums on Device” section) displays and lists all the photo albums you have in that account. If you choose this option, the photos will have to be loaded from online. If you’d rather display photos stored locally on your device, you can download photos from an album in Google Photos to an existing or new album on your device. Then you can select the local album in the “Albums on Device” section like we did in our example. You don’t have to be online when using photos on your device.
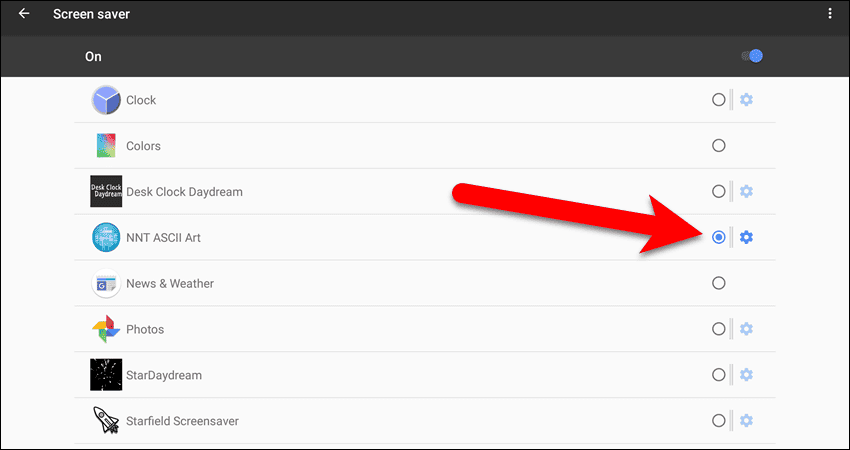
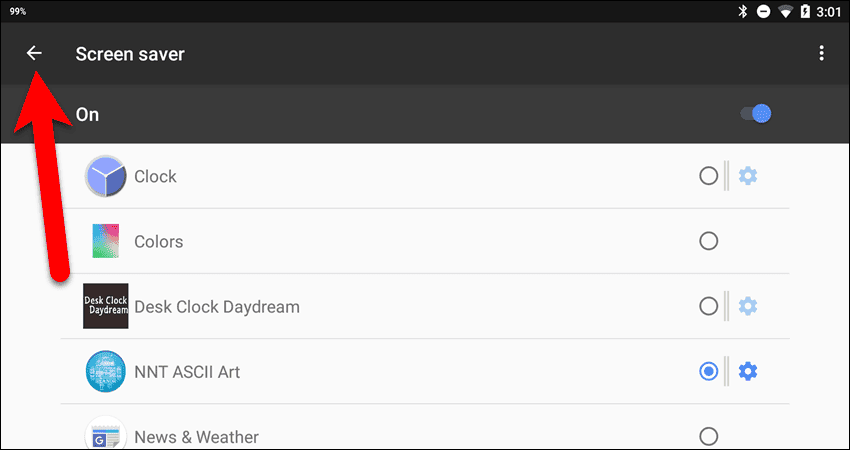
You can add more options to the Screen saver by installing apps from the Google Play Store that work with the Screen saver, or Daydream. For example, we added Desk Clock Daydream, NNT ASCII Art, StarDaydream, and Starfield Screensaver. You can explore the Play Store for more apps you can add to the Screen saver by searching for “daydream” in the store.
Choose When Screen Saver Starts
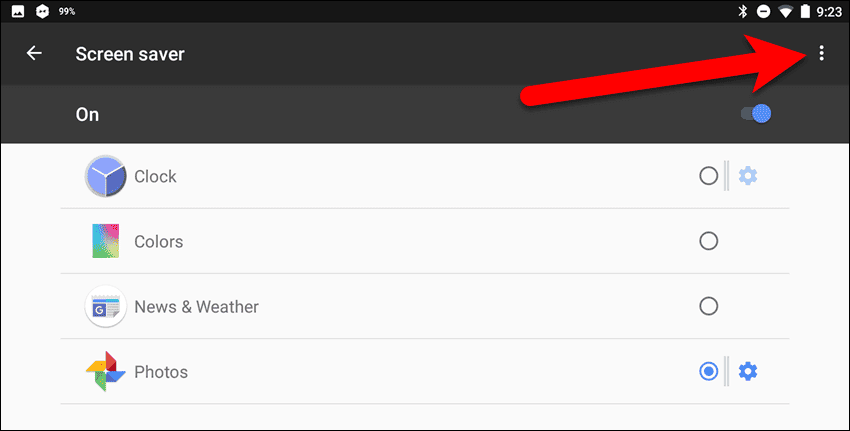
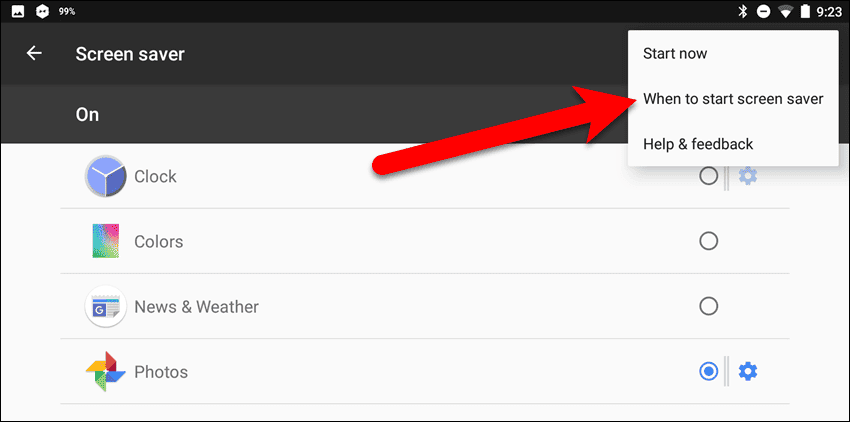
Now that you’ve chosen your screen saver and set it up, you can choose when it will start. To do this, make sure you’re on the “Screen saver” screen and then tap the menu button (three vertical dots).
Then tap “When to start screen saver” on the pop-up menu.
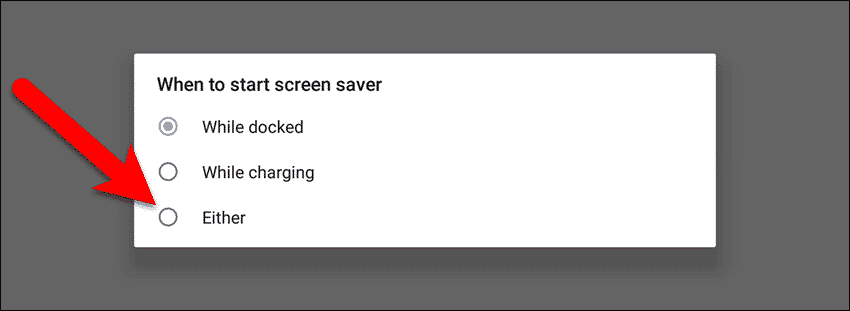
Select to start the screen saver “While docked“, “While charging“, or “Either“, if you sometimes dock your device. Or if you sometimes just plug it in to charge it.
Change Sleep Mode Time Interval
As we mentioned, when you enable Screen saver, it only starts when the screen on your device goes off on its own, or the device goes to sleep. You can adjust the amount of time it takes your device to go into Sleep mode. If you’re still on the “Screen saver” screen, tap the left arrow in the upper-left corner of the screen to return to the “Display” screen. If the “Settings” app is not currently open, swipe down from the top of the screen and tap the gear icon. Then tap “Display” on the “Settings” screen.
Under “Sleep” on the “Display” screen, you can see the number of minutes of inactivity before your device goes to sleep. To change this number, tap “Sleep“.
On the “Sleep” dialog box, tap the number of minutes your device will be idle before it goes to sleep.
The dialog box closes automatically and you see the number of minutes you selected under “Sleep“.
You can also keep the screen awake while your Android device is charging. You can also view and interact with apps while the screen is on and your device is charging. What do you use as a screen saver? What other cool apps have you found that work with the Android screen saver? Let us know in the comments. Δ Contact Us :- trendblog.guest@gmail.com


