This feature is available readily in Windows 10 Pro, Enterprise, and Education editions. It is not available in Windows 10 Home edition. We will guide you step by step on how to activate Hyper-V and create a virtual machine on your computer.
Step 1: Setting up Hyper-V
Hyper-V isn’t installed on your OS by default. It is already present in additional features in Windows. We will enable Hyper-V by checking some checkboxes and proceed with the activation.
Note: If you receive an error stating “Hypervisor not running” when you open the application, open the command prompt as administrator run the following command. Reboot your PC after the command executes. bcdedit /set hypervisorlaunchtype auto
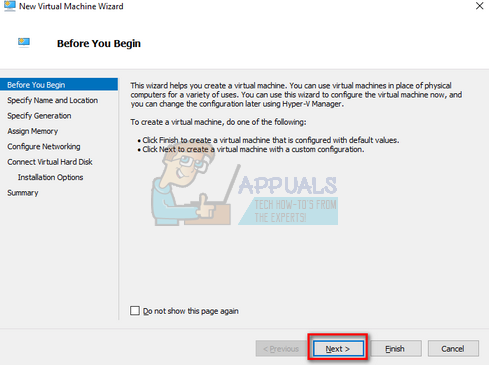
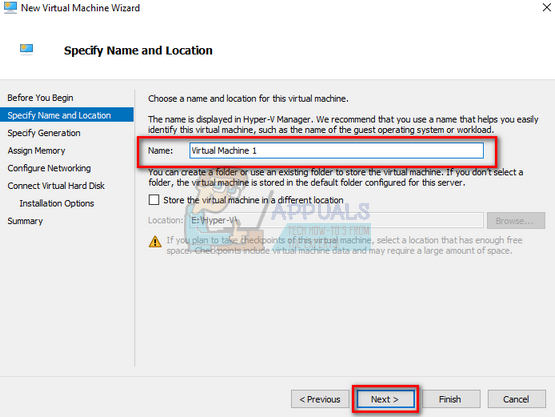
The top two entries will contain the location information. Select the option and press Browse to navigate the directory of interest. You should select a location where there is plenty of memory for you to load your virtual machine or save the data.
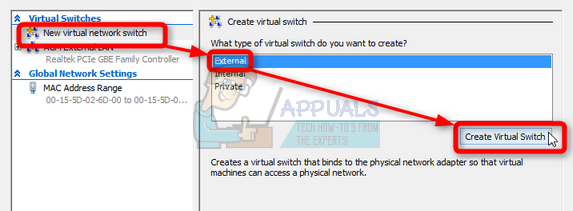
Step 2: Creating a Virtual Switch
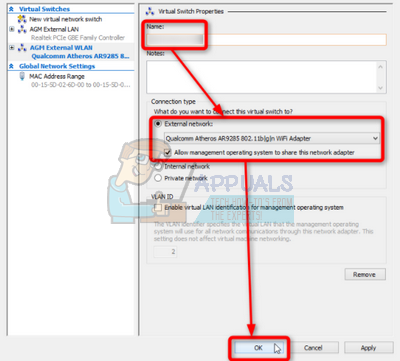
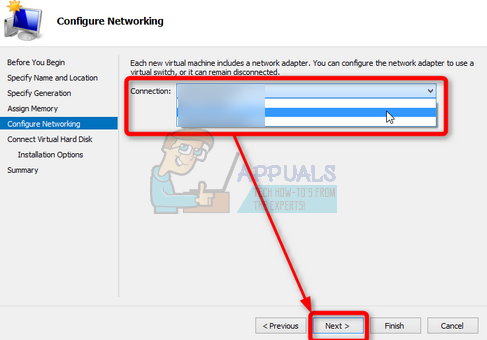
If we want to give the virtual machine access to the internet, we need to create a virtual switch first. It is a bridge between the virtual network adapter on the virtual machine and the physical network adapter on the host computer. The Hyper-V virtual machine has no way to connect to the internet without this virtual switch.
Note: For a virtual machine to connect to the internet, it has to use the virtual switch which in turn must be connected to a working host network adapter (also connected to the internet). For example, if we assign host WiFi network adapter to the virtual switch but it isn’t connected to the internet or is disabled, the virtual machine will not be able to connect to the internet. Furthermore, when Hyper-V is enabled and one or more virtual switches are created, the host system uses these switches to connect to the internet instead of the regular host network adapters. It is perfectly normal so don’t remove these virtual switches from your internet settings.
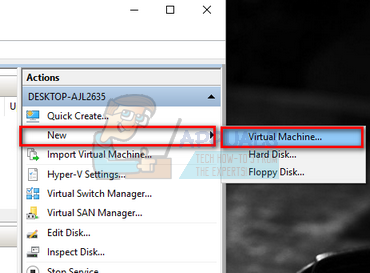
Step 3: Creating a Virtual Machine
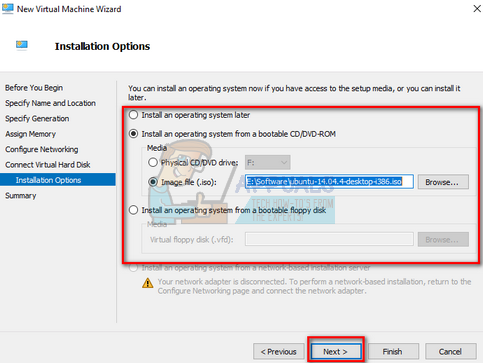
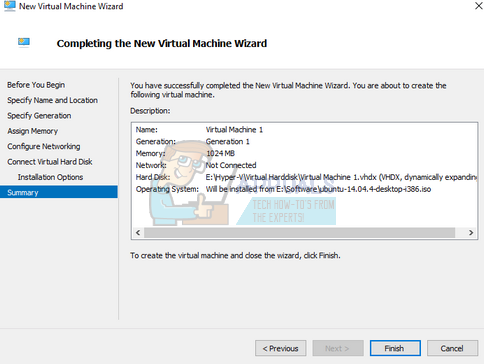
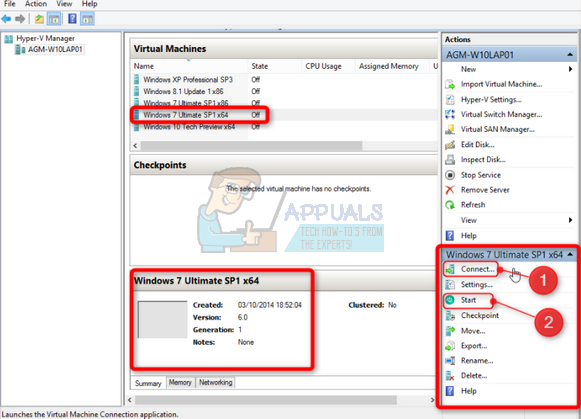
Now we are ready to create our virtual machine. Although Hyper-V was designed to run Windows OS, sometimes other operating systems such as Linux also works perfectly.
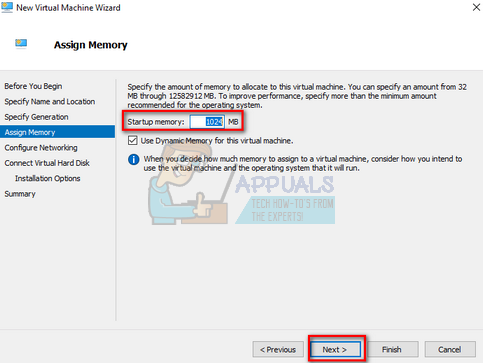
If you have 2 GB on your host computer, you should allocate more than 512 MB to the VM. If you have 4 GB on your host computer, you should allocate more than 1 GB to the VM. Also, select the option “Use Dynamic Memory for this virtual machine”. This lets your Hyper-V to be flexible by only using the amount of RAM needed at a given time. When the virtual machine starts up, it uses all of the allocated RAM. Later on when only a portion of the total is needed, it releases the free RAM back to the host (getting again more when required).
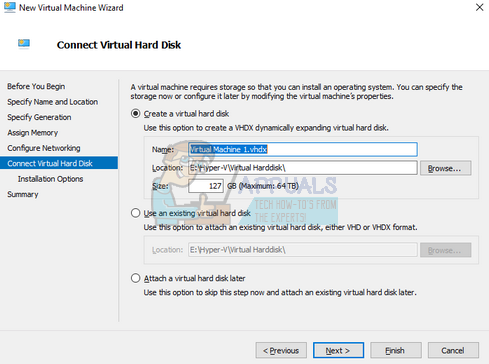
Note: By default, Hyper-V uses dynamically expanding VHD. If you create a VHD of 100 GB and only use 20 GB, Hyper-V will only use 20 GB. What size actually means is your virtual machine’s hard drive has the permission to expand up to 100 GB (which we allocated in this example). So the more applications you install or the more data you store, your VHD will increase in size proportionally.
Create Your First Virtual Machine in Hyper-V 2019How to Create a Windows 11 Virtual Machine using Hyper-VHow to run Hyper-V in a Virtual Machine with Nested Virtualization?Fix: Hyper-V Virtual Machine Stuck in Saved State


