So, this unique feature is called System Restore. All it does is that it creates a restore point by saving the current state of your Windows. After you have configured the System Restore feature in Windows 10, you can take full advantage of this feature. Whenever a new app, device driver or Windows update is installed on your PC, Windows can create it automatically or you can also configure it to set it manually. So, here I will be guiding you to configure the system restore feature in the latest build of Windows i.e. Windows 10.
Advantages of System Restore Feature:
You can create a restore point to save the current state of your Windows. It doesn’t require a large volume of disk space as compared to full-backup. It is easy to configure. Restoration process using System Restore Feature is like cutting a cake.
Configure System Restore Feature in Windows 10:
In order to create a System Restore Point using System Restore Feature of Windows 10, you have to enable it inside settings. Follow along this guide to get it done.
Enabling System Restore:
To enable system restore in Windows 10, follow the steps below. Search for System Restore using Cortana in your Windows 10. From there, click on Create a restore point.
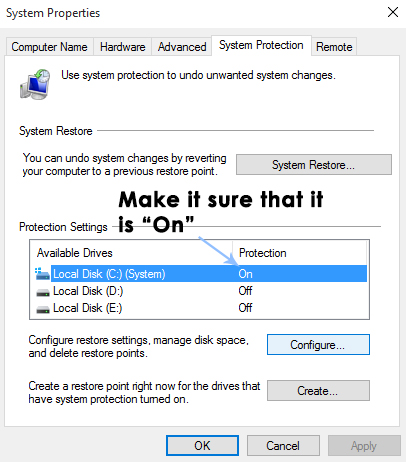
A System Properties window will appear containing the settings for restore point. Inside this window, navigate to Protection Settings and make it sure that protection is enabled on your Local Disk C (System Drive).
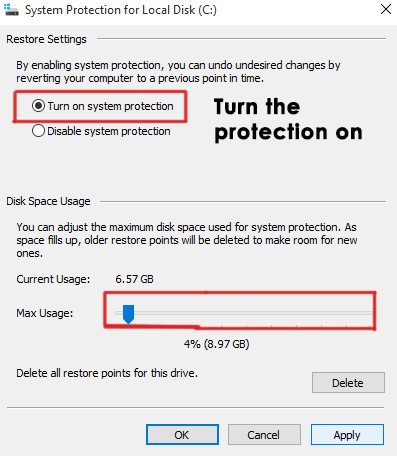
If it is disabled, select that disk and click on Configure button to enable the protection. You should also allocate the maximum disk space for system protection. You can set it to whatever value you want. Click on Apply and OK afterwards to apply the settings.
Now, the system will create a restore point automatically whenever an alteration happens inside your Windows.
Creating System Restore Point:
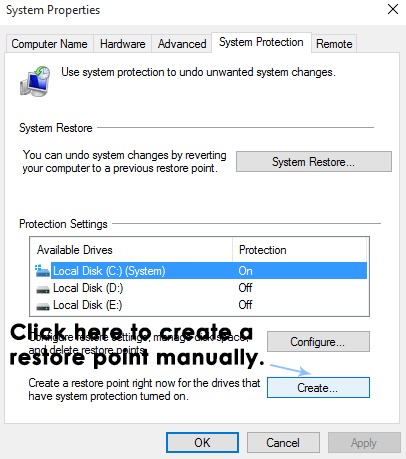
If you want to create a manual restore point (Which is preferred), then, follow along further. To create it manually, you need to click on click on Create button while selecting the Local Disk C inside System protection
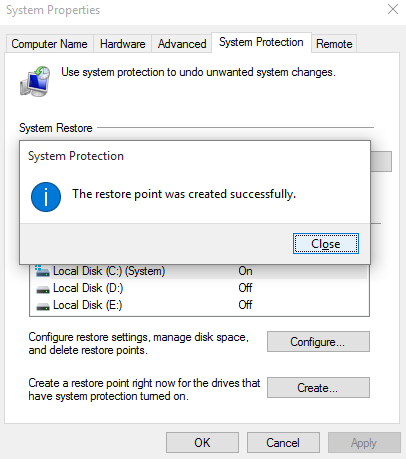
The next prompt window will ask you to type the description of your restore point. I prefer to type date of the restore point. It is important to manage the restore points accordingly. Click on Create button to start the process. It is a short process and might not take more than 1 minute.
Restoring the System using System Restore Point:
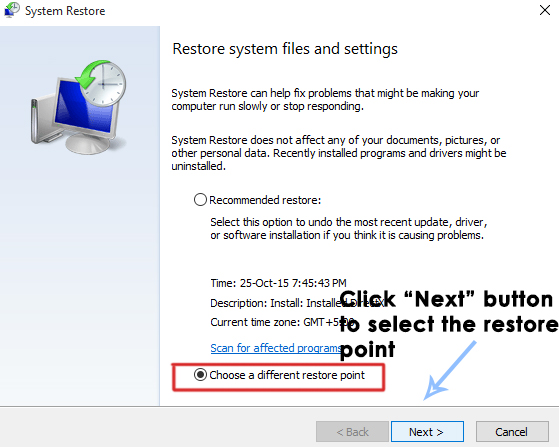
If, at some point, you come across certain issues with your Windows, you can restore your system to the restore point saved on your PC. In order to restore your system, follow the steps below. Search for System Restore using Cortana and click on Create a restore point. Inside System Properties window, click on System Restore Inside the System Restore window, select the option labeled Choose a different restore point and hit the Next button
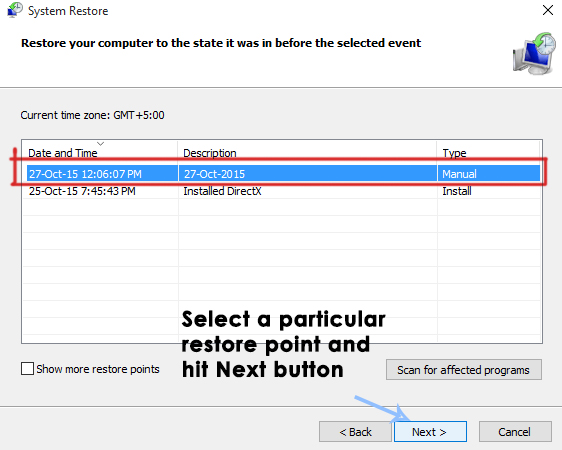
Select a particular restore point you saved before manually. You can also select any restore point present in the list and hit the Next button to initialize the restoration process. After the process is done successfully, you will be reverted to the state you saved before.
Restoring the System if you can’t Boot to Windows:
If you are unable to boot into your Windows 10, then you can follow along these steps. Open the Advanced Options by following this guide on How to start Windows 10 in Safe Mode. Inside Advanced options, click on System Restore and follow along the same procedure by selecting the Restore Point you created before. Your Windows will be restored back to the state which you saved before.
How to Configure and Restore Server Backups to Cloud in Simple Steps?Fix: To use System Restore, you must specify which Windows Installation to…Fix: System Restore Failed to Extract the File from the Restore PointFix: Windows could not Configure One or More System Components

