Although, the support for older ones is not available inside Windows 10 but still, you can install drivers using the method I’m going to mention below. So, in that way, you would be having a full functioning Ethernet adapter.
How to Get Rid of this Problem?
It is common that you might not find drivers on the internet using the name or build of the Ethernet adapter. So, for that purpose, you need to follow the instructions below in order to find the drivers.
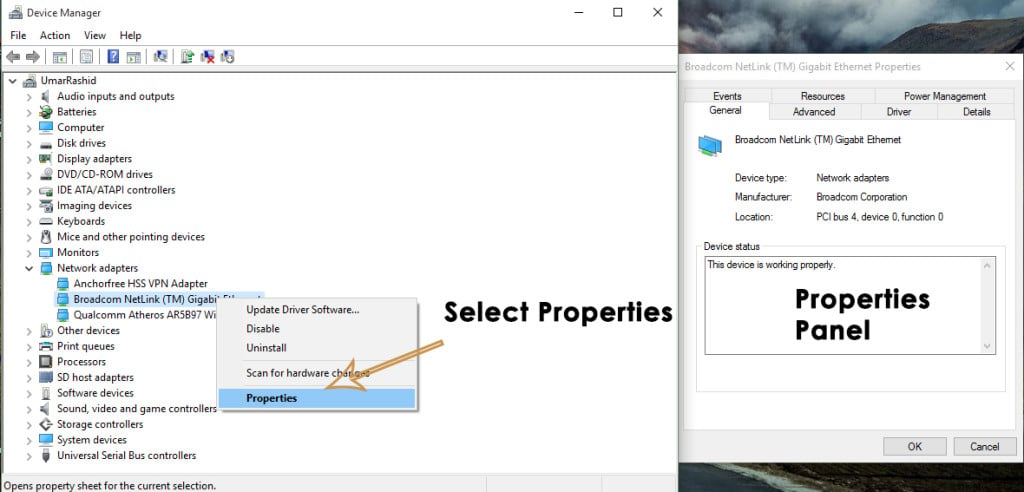
Go to your Device Manager by pressing Win + X on the keyboard and selecting the Device Manager from the list. Move to the Ethernet adapter you are having problem with and right click over it. Select Properties from the list.
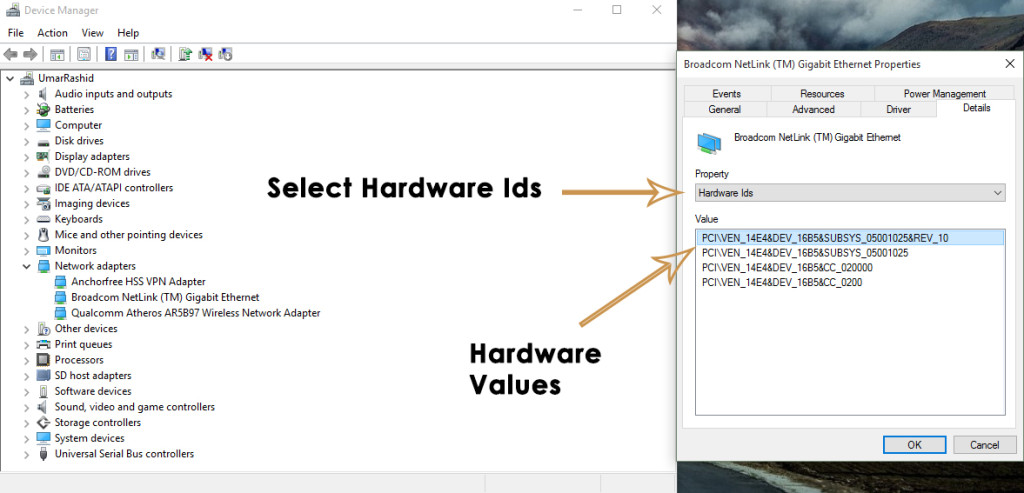
From the properties panel, click on the tab labeled as Details. There you would find a Property drop-down with a plenty of options in the list. All you need to do is to search for Hardware Ids inside Property list and select it. In the Value section below the Property drop-down, you will find some information like in the image below.
Copy the 1st value and paste it inside a search engine like Google. Search engine would display the drivers related to that particular Hardware ID. Download the relevant Ethernet drivers from the listed websites.
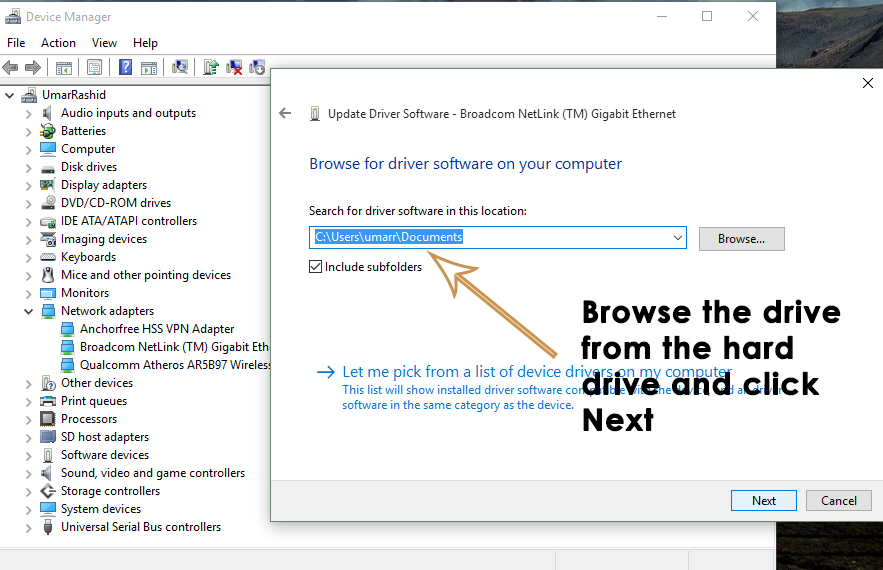
After downloading the drivers, install them by going to Device Manager and right clicking on the malfunctioned Ethernet adapter. Select the Update Driver Software from the list and browser the drivers from the hard drive you downloaded before. Click Next and it would start installing it. Restart your PC after installation and you would be able to use Internet through a cable on your PC.
How to Pair Xbox One S Controller with Xbox One Controller DongleHow to Fix ‘An Error Occurred while Renewing Interface Ethernet’Fix: Ethernet Switch Error Virtual machine failed to start in Hyper-V 2019Fix: DHCP is not enabled for Ethernet


