A pool header error is basically related to bad Windows memory allocations. This can happen because of a wide range of things. But, the most common culprit behind this error are badly configured or outdated or wrong drivers. Since it is related to the memory allocations, bad RAM is also a suspect when it comes to the reasons behind this issue. Lastly, there are a few antivirus programs that can cause the bad pool header issue as well. So, go through each of the methods below and check which one works for you.
Method 1: Disable/Uninstall Antivirus
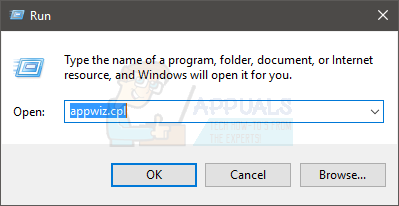
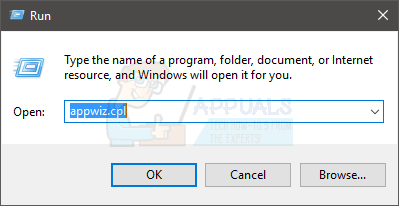
There are a few antivirus programs that are known to cause this issue. So, the very first step that you should take is to disable or uninstall the antivirus. Although it might not be the most common cause but it certainly will helps us narrow down the reasons behind the error.
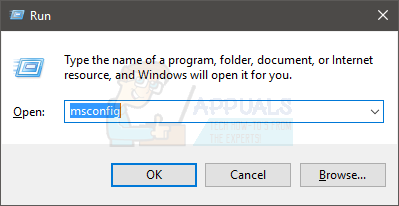
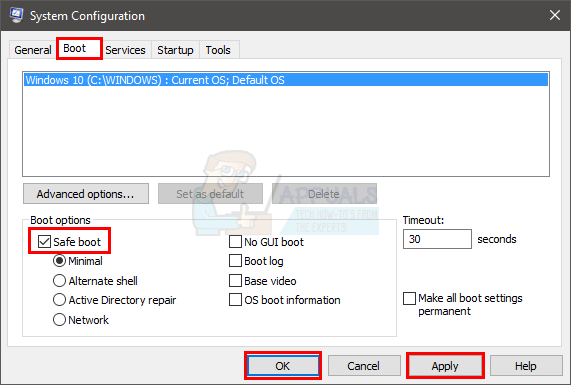
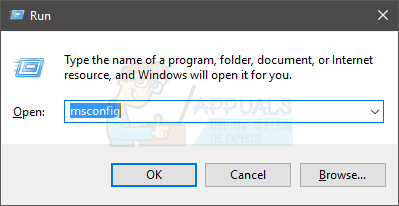
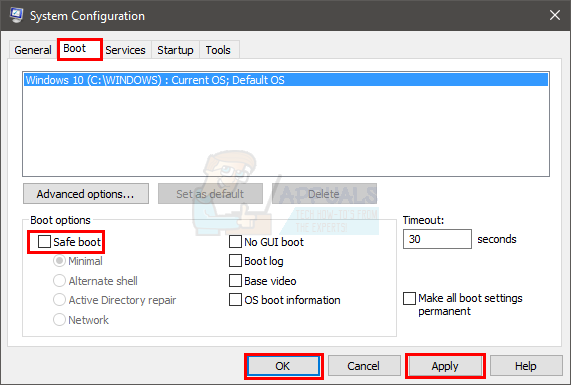
Once you are done, restart the computer and check if you experience a BSOD again or not. Note: You don’t have to uninstall the antivirus program, you can just disable it from its icon in the system tray (bottom right corner). Just right click the antivirus icon and select the Disable option. If you can’t see a Disable option, double click the antivirus icon and disable it from the antivirus menu. The option will vary from antivirus to antivirus but all antiviruses have this option. If you can’t uninstall the antivirus because the BSOD keeps happening then you can try to go to the Safe Mode and then uninstall the antivirus. Follow the steps below to do that
Once you are done, follow the steps given below to get out of the Safe Mode
Restart the PC if it doesn’t restart automatically. Once your system reboots, you should be in the normal mode. Your issue should be resolved now. Note: Antivirus is important for your computers safety, if the problem gets solved by uninstalling the antivirus then switch to another antivirus. Not all of the antivirus programs cause this issue so you can have a different one without worrying about this specific issue.
Method 2: Turn off Fast Startup
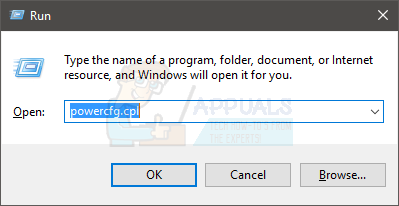
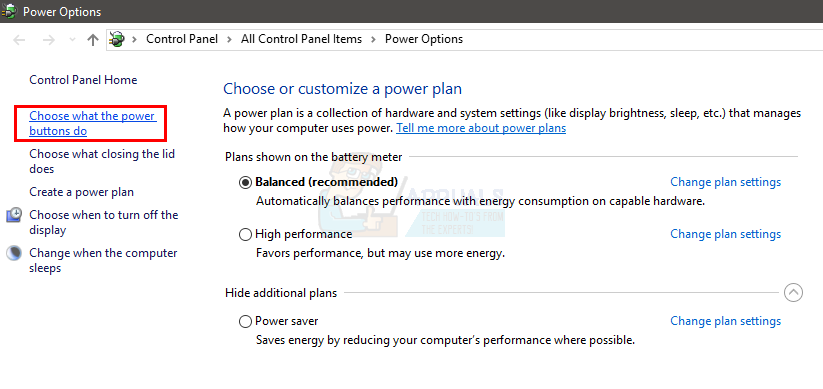
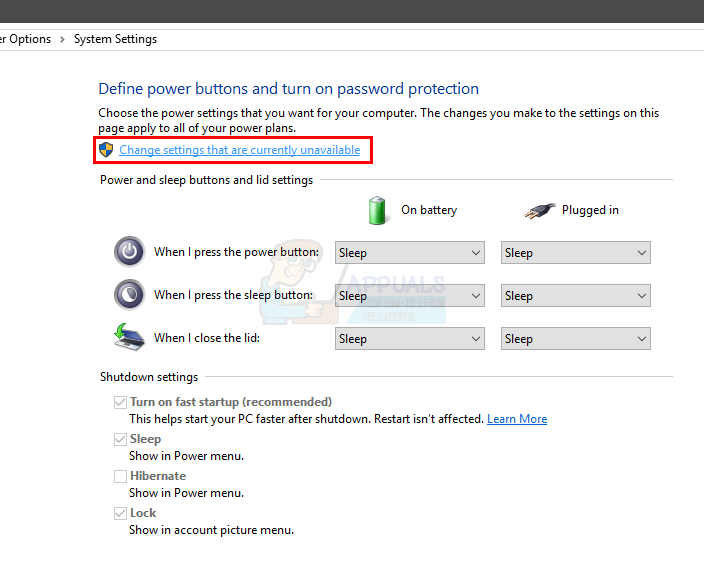
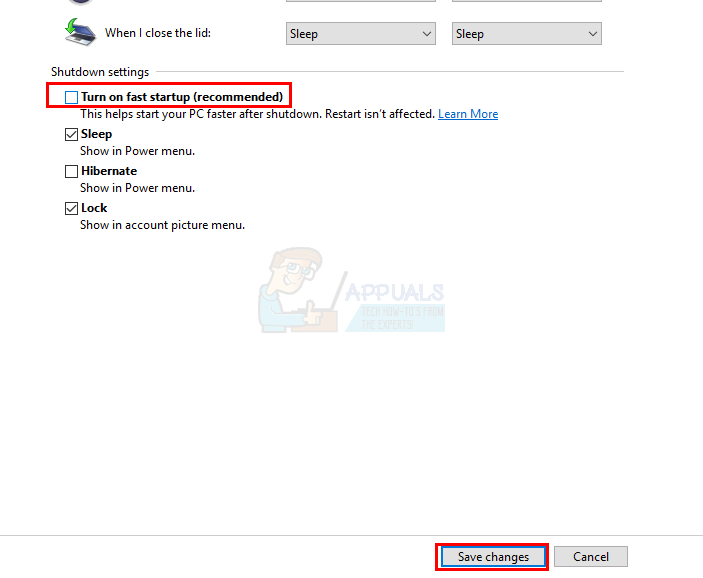
Turning off fast startup works for a lot of users as well. This option, basically, makes your computer startup a lot quickly as compared to normal startup. This can create problems because the fast startup might not be giving your drivers or programs enough time to load up properly.
Restart your PC and check if the error is still there or not.
Method 3: Check Drivers
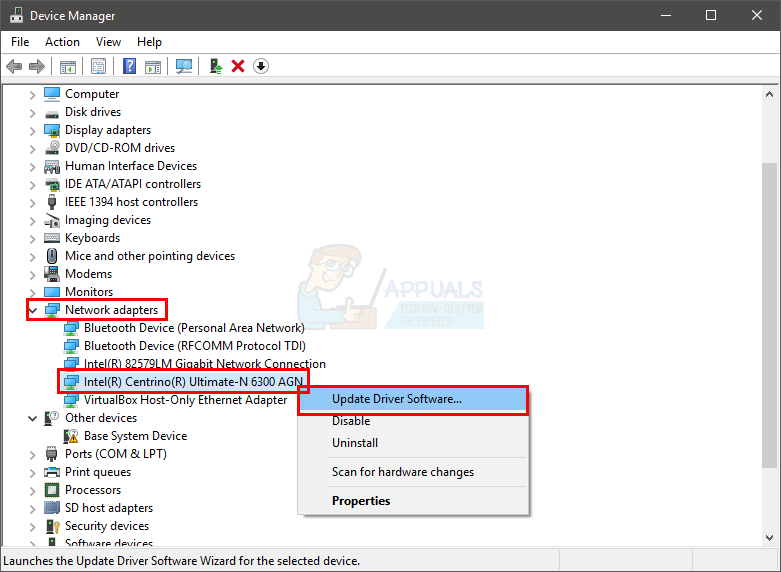
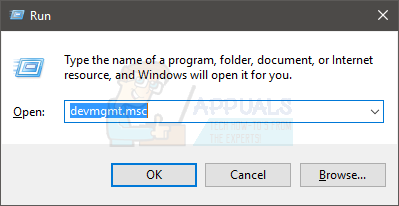
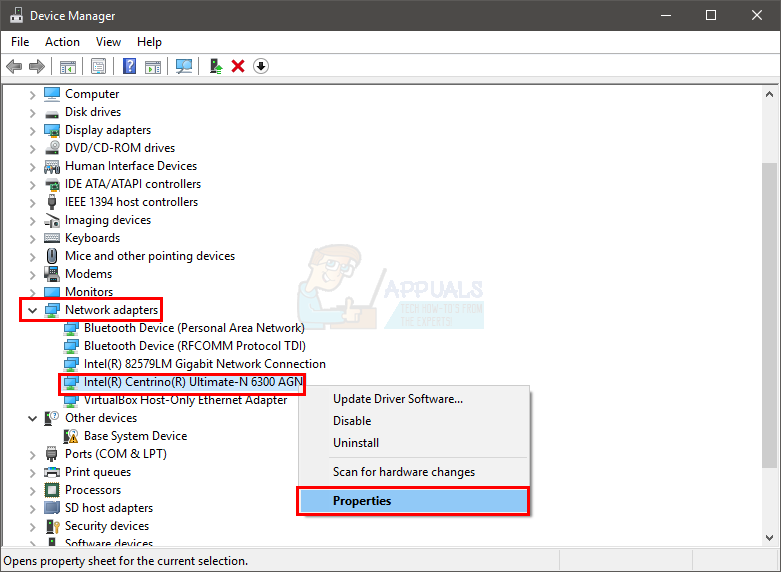
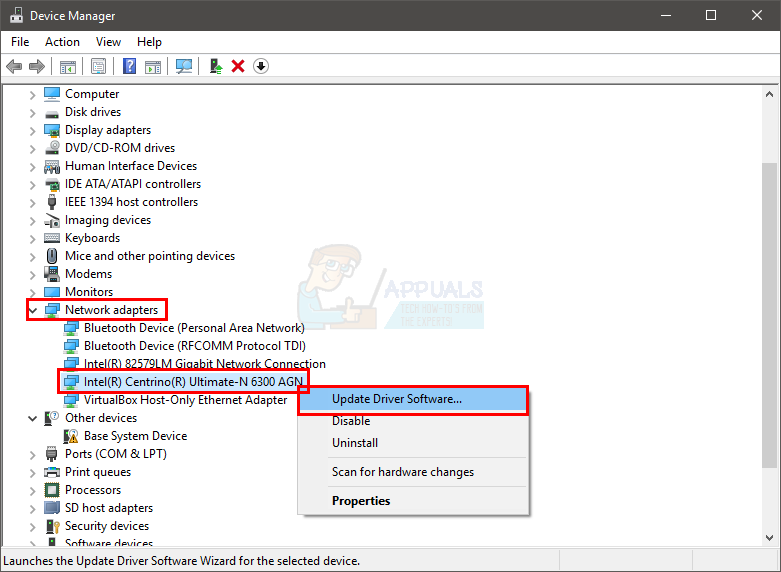
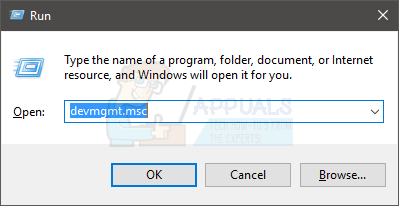
Drivers are one of the most common reasons for this error. If you recently upgraded or updated the Windows then your drivers are most likely the culprit behind it. A lot of the times, Windows automatically install the generic drivers on top of your third party drivers or Windows install a new version of a driver during the upgrade/update. These newly installed or updated drivers might not be suitable or updated or properly configured, hence, causing the problem. Although we know the problems might be caused by the drivers but troubleshooting and narrowing down to which driver is causing the issue is a long procedure. So, we recommend you perform the steps in this method for all the devices and drivers. On the other hand, if you have seen a pattern in the BSOD, e.g. the BSOD happens whenever you connect to the internet, then you can target the specific drivers. In our example of internet related BSOD, your priority should be your Ethernet or Wi-Fi card drivers. So, follow the steps below to check the drivers. Note: The steps below are for the network adapter drivers, you should repeat the steps for all or for the devices that you think might be causing the issue.
Check if any of your devices have a yellow warning sign. The yellow warning sign will indicate a problem. If you see a red sign then that means the Windows is having a problem in establishing a connection with that device. The steps for handling both situations are given below. You should also check other devices/cards in the device manager and repeat the below given steps if you find any yellow or red signs with those devices. If you see a yellow warning sign then do the following:
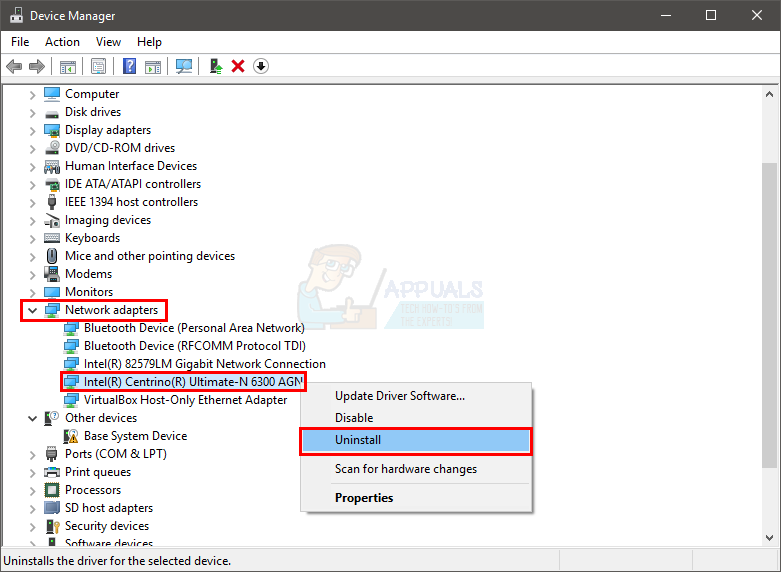
Right click your device/adapter and select Update Driver Software…
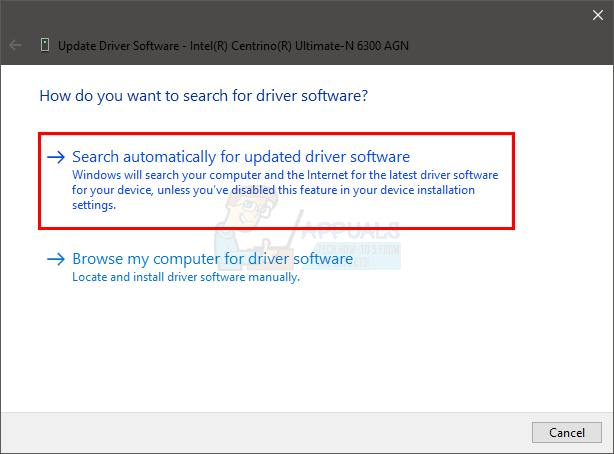
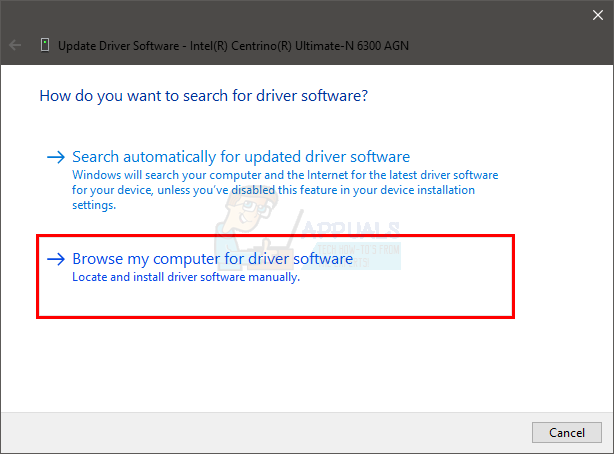
Select Search automatically for updated driver software
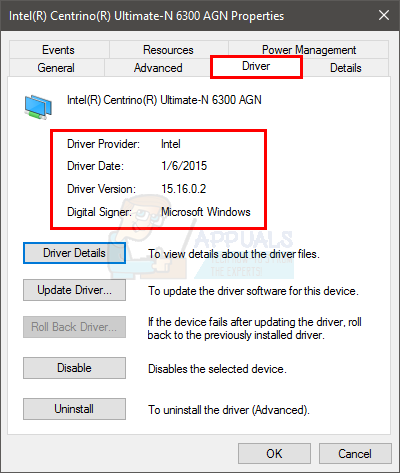
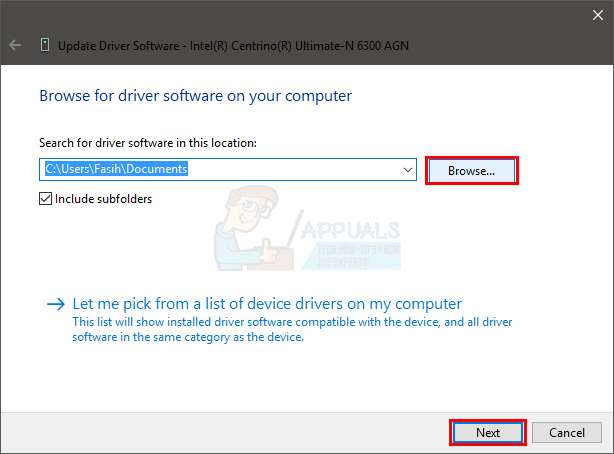
If that doesn’t find anything then go to your sound card manufacturer’s website and look for the latest driver version. Download the latest driver from the website and keep it somewhere where you can find it easily later on. Once you find the latest drier version then follow the steps given below
If the problem still isn’t solved then you need to uninstall the driver and let the windows install a generic set of sound drivers. This will most likely solve the problem since Windows install the most compatible drivers.
Once your computer is restarted, the Windows should have automatically installed a new generic driver for your device. This should solve the problem.
Method 4: Check RAM
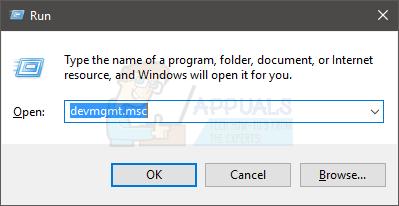
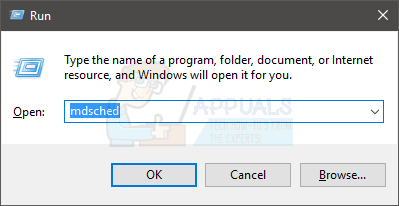
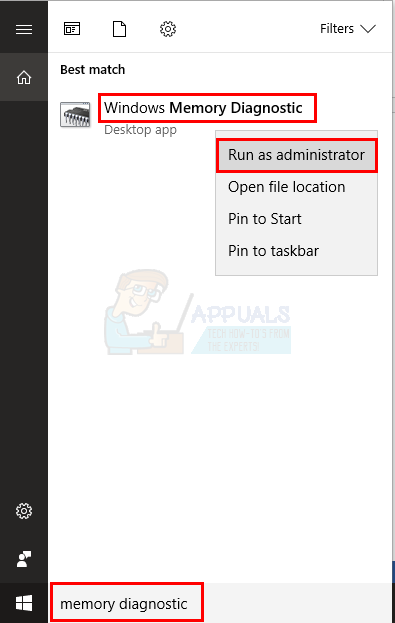
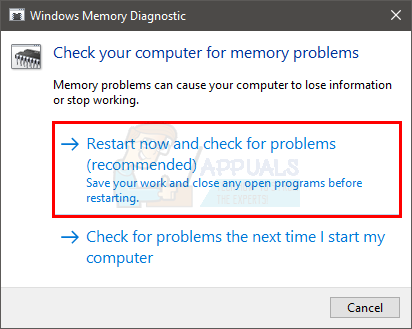
As mentioned in the beginning, the problem can be caused by faulty RAM as well. This might be because of loosely attacked RAM or dust around the RAM or slot. But, mostly it is because of a faulty RAM. The first thing that you should do is to take out the RAM, clean the RAM, make sure there isn’t any dust in the slots and put the RAM back. Make sure the RAM is properly connected. Once done, turn on the system and check if the problem persists. If the problem is solved then consider yourself lucky as it was a simple troubleshooting process. But, if the problem is still there then get prepared to spend some time in checking the RAM conditions with the help of the memtest. Windows Memory Diagnostic Since Memtest is a third party tool and you might be hesitant to use it, you can use the Windows own built-in memory diagnostic tool for checking the memory. Although it isn’t seen as the most accurate tool when it comes to memory testing but it does provide some sort of diagnostics for your RAM. So, it is worth a try especially if you don’t want to jump right to the Memtest or if you don’t have a lot of time. Follow the steps given below to start the Windows Memory Diagnostic tool
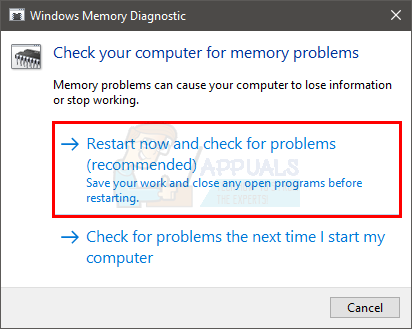
Note: If it gives any errors or if it doesn’t work then follow the steps below
The Windows will restart automatically and the testing will begin. You will be able to see the testing and its results on the screen. Once the testing is finished, your computer will automatically restart and you will see the test results when you log on to the Windows again. You will be able to determine whether your need to change your RAM or not from the test results. Memtest Memtest is basically a program that is used to test the conditions of your RAM. It takes a lot of time but it is quite useful in determining the condition of your RAM. Go here and follow the steps in method 1 to check your RAM. Manual Testing Since Memtest takes a lot of time, you also have another option if you aren’t patient enough and you have a spare RAM. You can replace your RAM with a new or another RAM (from another computer) and check if your system still gives the error. Make sure the RAM is in working condition and it is compatible with your system. If replacing your RAM works fine and doesn’t give the BSOD then your RAM is most likely the cause behind the issue. You can still use the Memtest just to make sure, though. Once you are done testing, replace the RAM with a newer one or another working one (if the problem was caused by the RAM).
Fix Windows Update Error 0XC19001E2 in Windows 10 (Fix)How to Block Windows Store in Windows 10 and Windows Server 2019Fix: Error 0x80073CF9 in Windows Store on Windows 10 MobileFIX: Error 0x80246002 and BSOD during Windows Update in Windows 10
