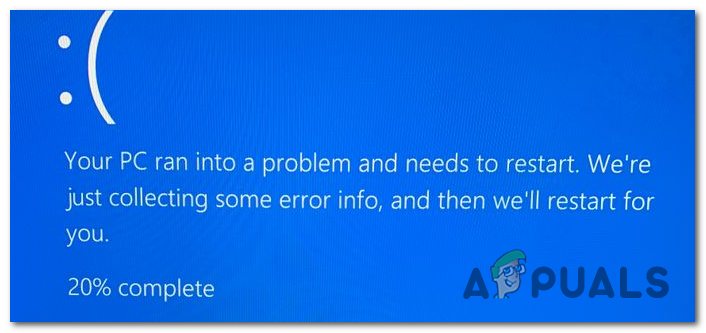
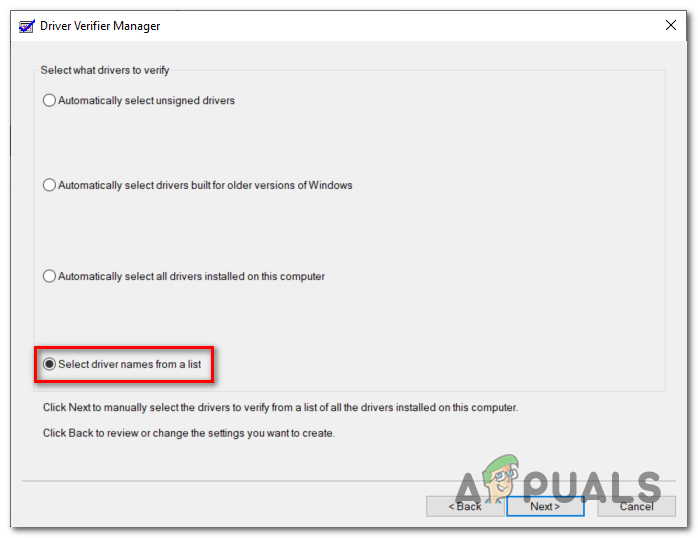
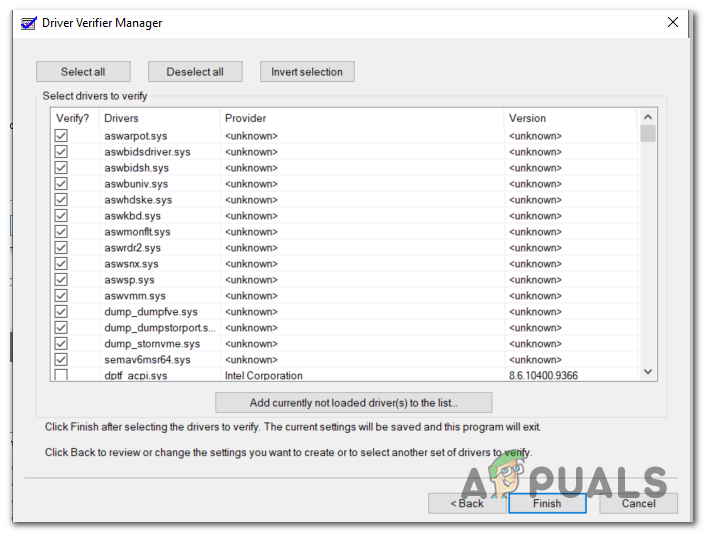
In case you’re trying to update your BIOS directly through your OS, keep in mind that this is not the best approach and this procedure by itself might end up facilitating the apparition of various BSOD due to two 3rd party drivers conflicts. If possible, try updating your BIOS version from a flash drive. As it turns out, one of the most common causes that will end up triggering a BSOD during the process of updating the BIOS version is a utility called Driver Verifier. This built-in tool puts stress on the driver intentionally, and some BIOS flashing utility will crash as a result. In this case, you can resolve the issue by disabling the Driver Verifier while the BIOS updating process is taking place. If a machine interruption during the BIOS has caused the problem, you can resolve the issue by using the System Restore utility to return your computer to a healthy state. If that doesn’t work, consider performing a repair install. Another potential driver that might cause conflict is the WiFi (wireless), driver. Reinstalling it has solved the problem for some affected users.
Method 1: Disable Driver Verifier
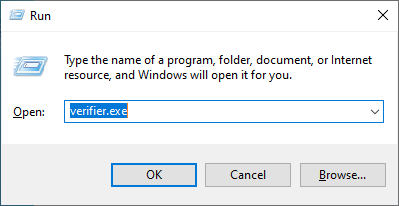
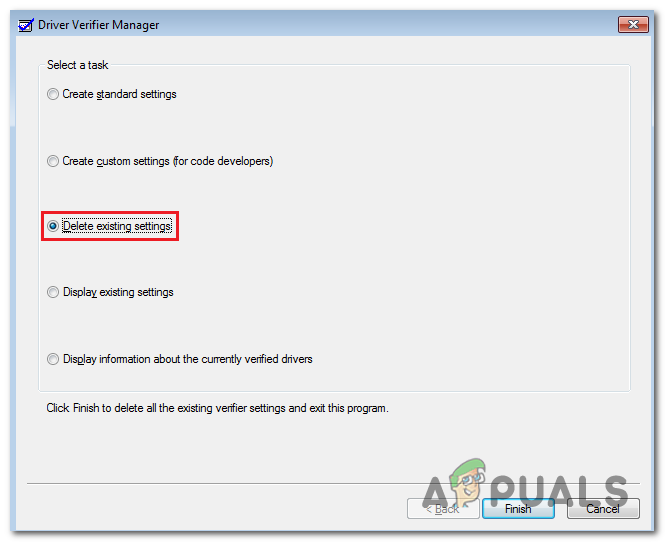
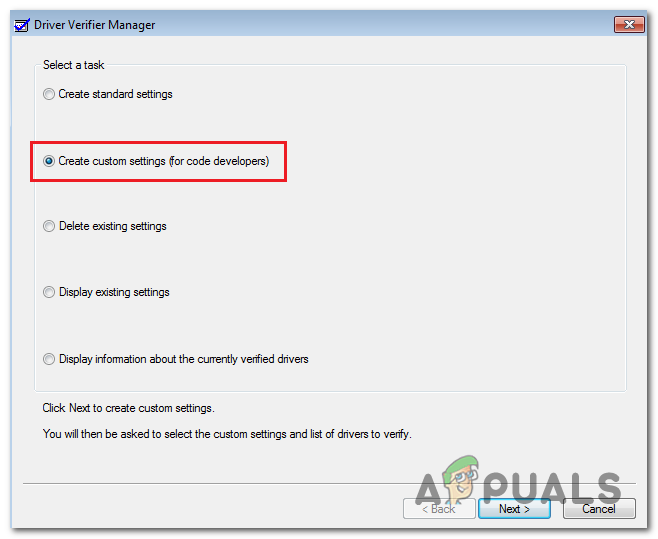
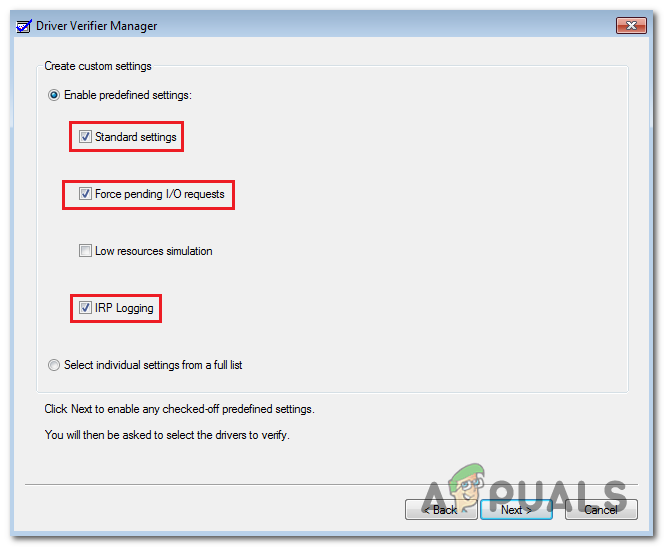
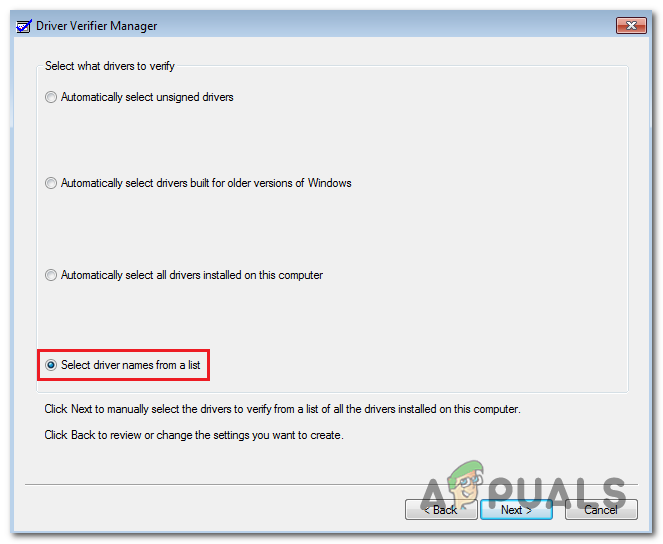
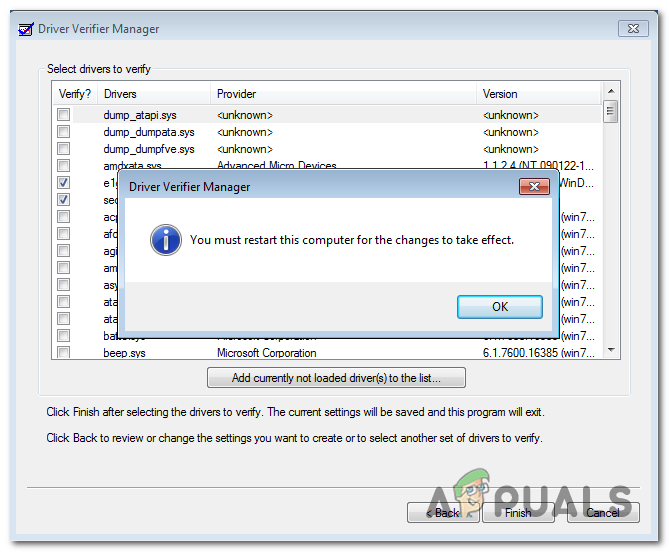
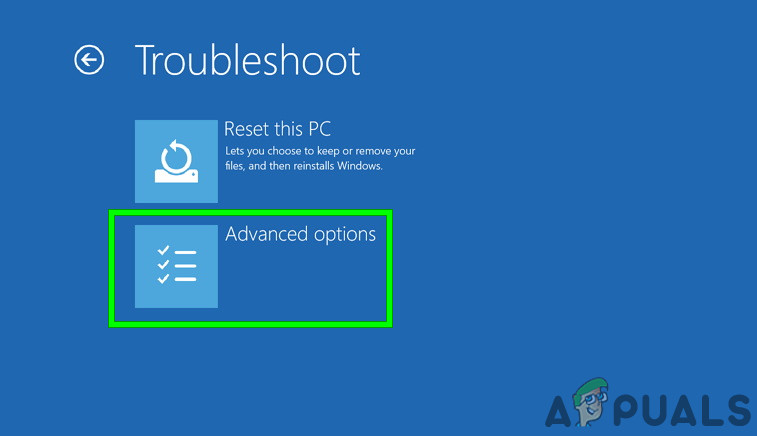
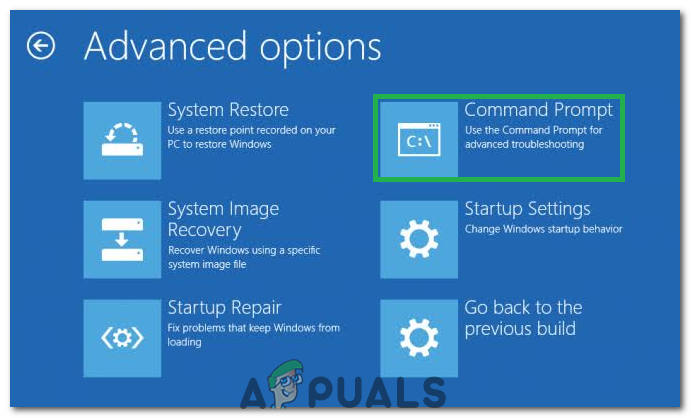
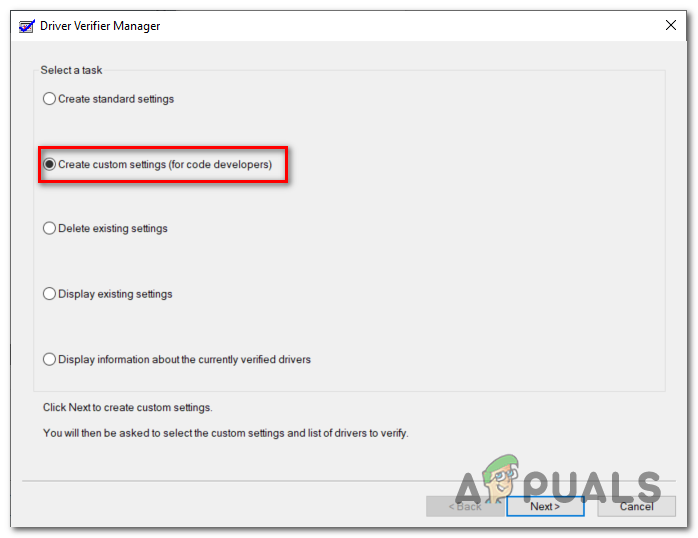
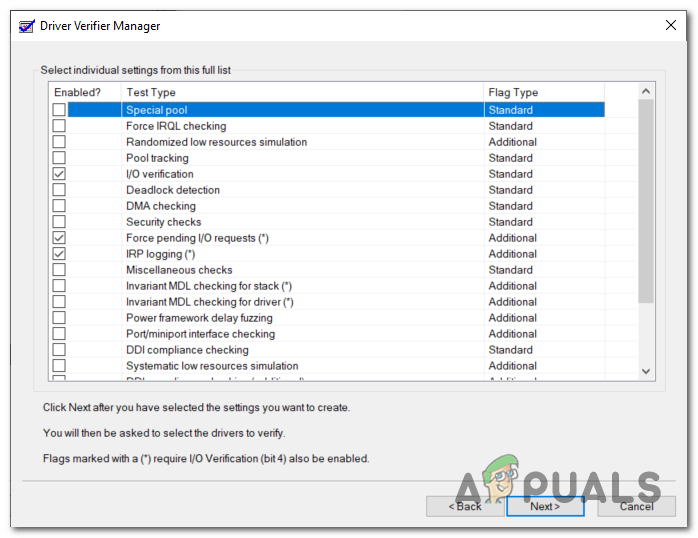
Driver Verifier is a built-in diagnostic tool that is present on Windows 7, Windows 8.1 and Windows 10. Its main purpose is to verify both native Microsoft drivers and third-party drivers. It works by putting the drivers under a lot of stress in order to force incompatible or outdated drivers to misbehave. While this feature is good for maintaining a healthy selection of drivers, it tends to conflict with BIOS flashing utilities. Keep in mind that BIOS flashing utilities tend to be a little more than basic scripts that aren’t updated often by motherboard manufacturers. Because of this, the vast majority of BSODs that show up during a BIOS updating procedure are actually caused by Driver Verifier – especially if it points to the Amifldrv64.sys. If this scenario is applicable, the solution to your problem is simple – you’ll need to disable the driver verifier while updating the BIOS firmware and then enable it again after the procedure is complete. And since the procedure is different according to your OS version, we featured two different sections – one for users that are able to boot and one for users that are unable to get past the login screen. Use the first guide if you can get to the Windows menus, or use the second one if your machine is no longer able to boot in order to do it from the Recovery menu.
How to Disable & Enable Driver Verifier via Driver Verifier Manager
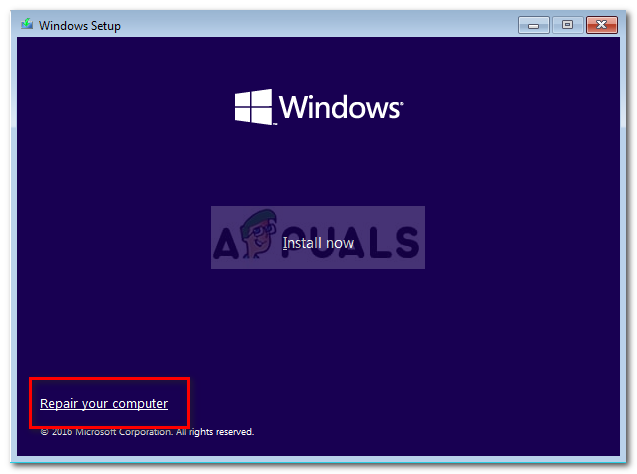
How to Disable & Enable Driver Verifier via Windows Recovery
In case the same issue is still occurring even if after you disable the Driver Verifier, move down below for an alternative of fixing the amifldrv64.sys BSOD.
Method 2: Using system restore
Keep in mind that amifldrv64.sys is normally associated with the MSI Live update agent and a BSOD (Blue Screen of Death) associated with it typically appears after a failed BIOS update. If this happened in your scenarios, chances are you are no longer able to boot up your computer properly. In this case, one viable fix is to use the system restore utility to bring back your computer to a state before the BIOS update was attempted. To do this, you can follow this article here. It will show you how to use a previously created restore point and how to open the System Restore utility in case you can’t get past the initial booting sequence. In case you’ve already tried this with no success or you don’t have an appropriate restore snapshot, move to the next potential fix below.
Method 3: Uninstall the MSI Live Update Program
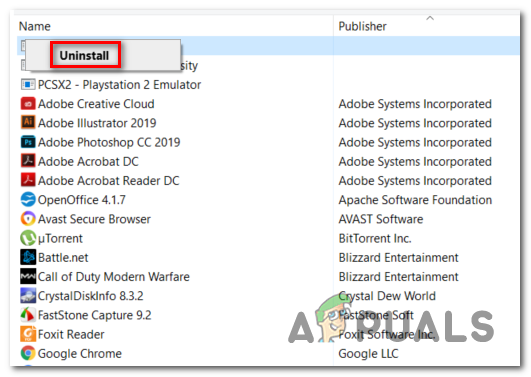
If the BSOD points towards the amifldrv64.sys or NTIOLib_X64.sys files, but the BSOD doesn’t happen at startup (you can get past the booting sequence), it’s very likely that the random BSOD crashes are caused by the MSI Live update program. Several affected users that we’re also struggling to resolve this problem have reported back that they finally managed to stop the BSOD from occurring after uninstalling the Live Update program. Getting rid of it means that you’ll lose the ability to update BIOS and chipset drivers automatically, but if it allows you to achieve stability it’s better than frequent BSOD crashes. Here’s a quick guide on how to uninstall the MSI Live Update Program: In case you’re still encountering this issue, move down to the next method below.
Method 4: Creating a Bootable BIOS Update USB
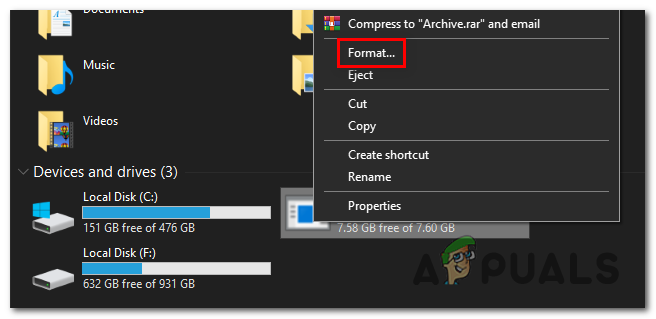
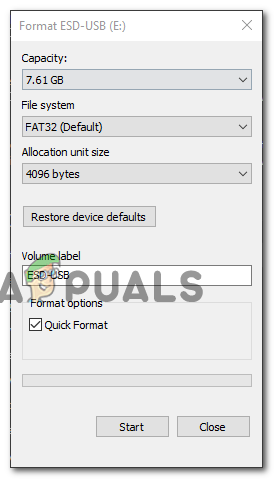
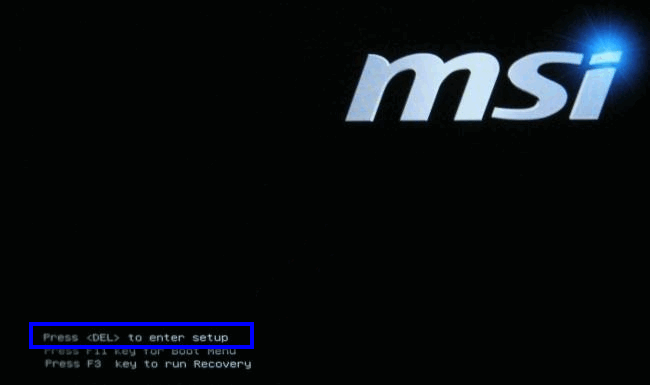
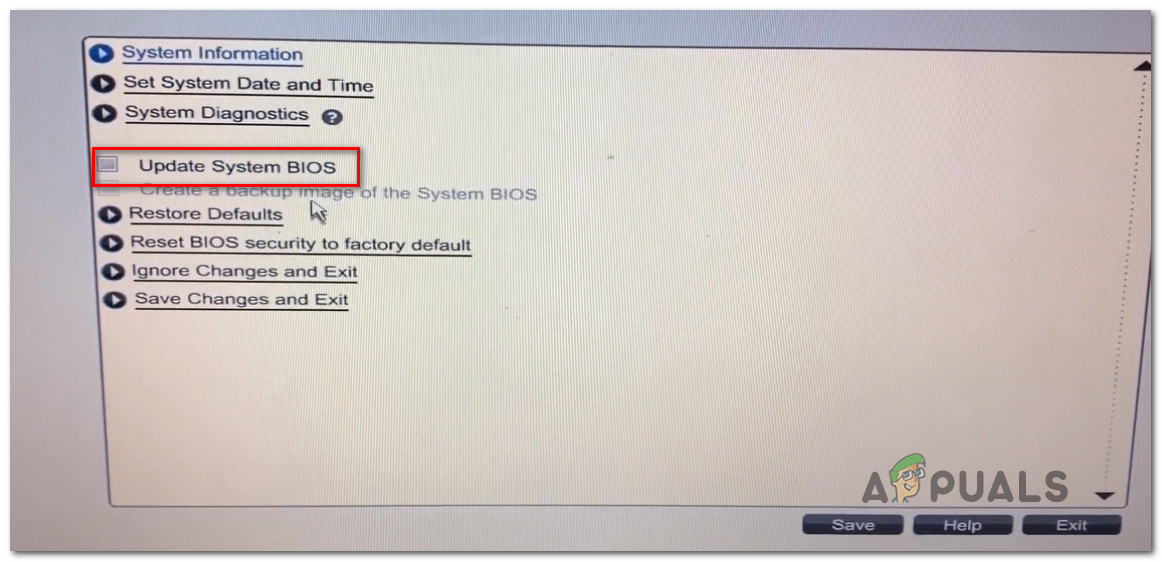
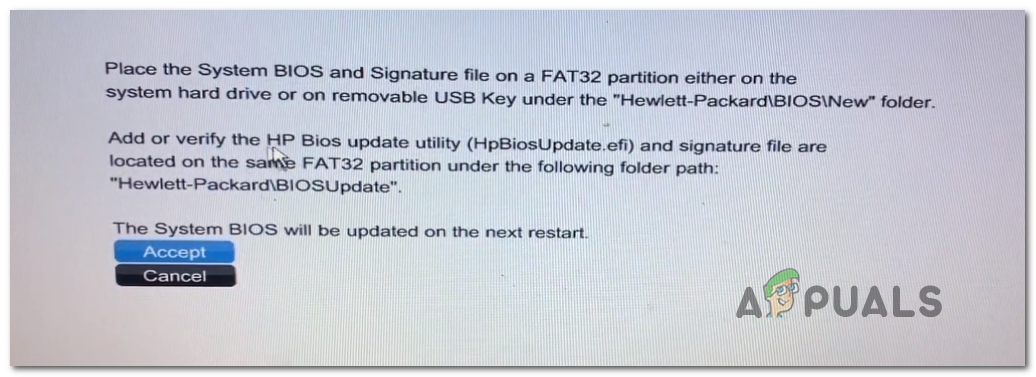
If you’re receiving this BSOD while trying to flash your BIOS within your OS, chances are you’ll have to go for the flash drive utility method in order to complete the procedure without receiving the error. Flashing the BIOS in your OS is definitely an easier procedure, it’s also known to cause a lot of problems and might even break your PC ability to boot up. If this scenario is applicable, you should be able to fix the issue by creating a bootable USB containing the BIOS update and install it from the initial screen. Keep in mind that each manufacturer has its own BIOS updates according to their various models and the steps of installing it will be slightly different. Although there is no universal way of flashing a BIOS via USB, we’ve created some general steps that should point you in the right direction. Important: Consult the official documentation provided by your manufacturer on how to update your BIOS version via USB. Here’s how to create bootable BIOS Update USB: In case the same issue is still occurring or the issue started occurring after you managed to install your BIOS update, move down to the next potential fix below.
Method 5: Reinstalling the WiFi adapter
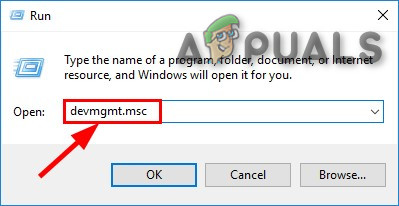
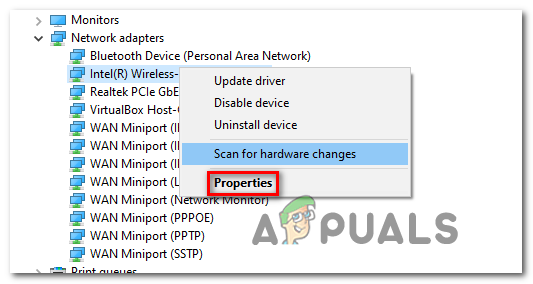
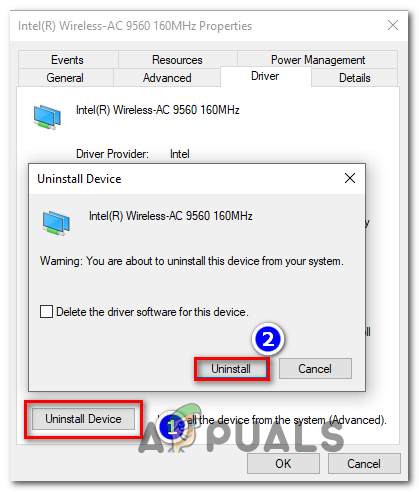
If you started to encounter the issue immediately after you completed a BIOS update (or after a failed attempt), you should also investigate your WiFi adapter driver. As it turns out, a botched BIOS update can also affect the WLAN driver. We managed to identify several users reports confirming that this particular culprit was causing the issue in their case – In every case, the issue was resolved by reinstalling the WiFi adapter driver via Device Manager. Here’s a quick guide on reinstalling the WiFi adapter driver via the Device Manager in order to stop any BSOD’s pointing towards amifldrv64.sys or NTIOLib_X64.sys: In case the issue persists, move down to the final method below.
Method 6: Performing a repair install
If none of the instructions above have worked for you, chances are you’ll need to refresh every OS component in order to replace the corrupted instances. The most efficient way of doing so is by doing a repair install. But keep in mind that you’ll need a compatible media in order to complete the process. Here’s how to create compatible installation media for Windows 7 or Windows 10.
FIX: DRIVER_IRQL_NOT_LESS_OR_EQUAL (netio.sys) OR…How to Fix igdkmd64.sys BSOD on Windows 10How to Fix BSOD Caused by rtwlanu.sys on Windows?How to Fix Intelppm.sys BSOD on Windows 7,8 or 10
