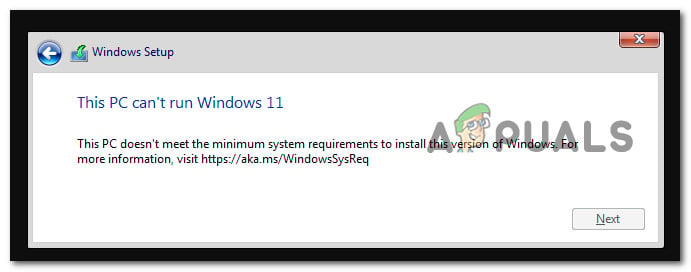
After looking into his issue thoroughly, we realized that there are actually multiple potential causes why this issue will occur. Even though the underlying message will most likely hit that your PC is not meeting the minimum requirements, you’ll see that this is not always the case. To make matters easier for you, we’ve put together a list of potential culprits that are most likely responsible for this issue: Now that you are familiar with every potential cause of this issue, let’s get to the fixing part. Below you’ll find a list of fixes that other affected users have successfully used to get to the bottom of this issue.
1. Meet the minimum requirements
If you’re just beginning to troubleshoot the ‘This PC can’t run Windows 11‘ error with WMware Workstation, the first thing you need to do is ensure that your current PC setup meets the minimum requirements:
The system disk needs to be 64GB or largerThe processor isn’t supported for Windows 11 – 1 gigahertz (GHz) or faster with 2 or more cores on a compatible 64-bit processor or System on a Chip (SoC)The PC must support Secure BootThe PC must support TPM 2.0TPM2.0 must be enabled
Note: While the TPM 2.0 and Secure Boot requirements can be bypassed with a few workarounds that we will show below, the other ones are mandatory. So before proceeding with the next methods below, make sure that you meet the free disk space and processor requirements. Once you’ve made sure that you’re meeting the minimum requirements, move down to the next method below.
2. Enable Secure Boot and TPM 2.0 on VMware
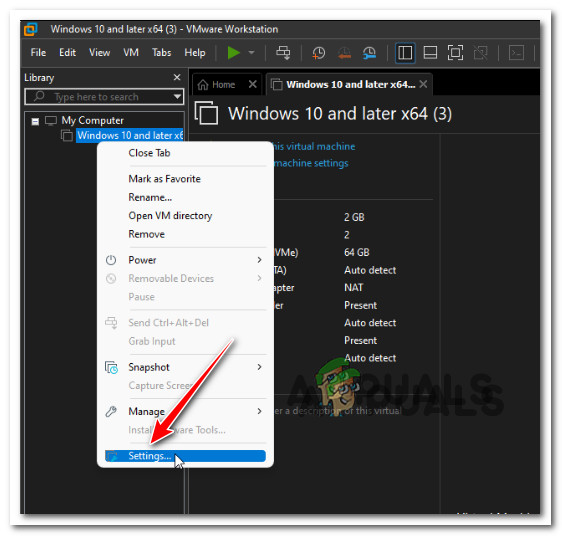
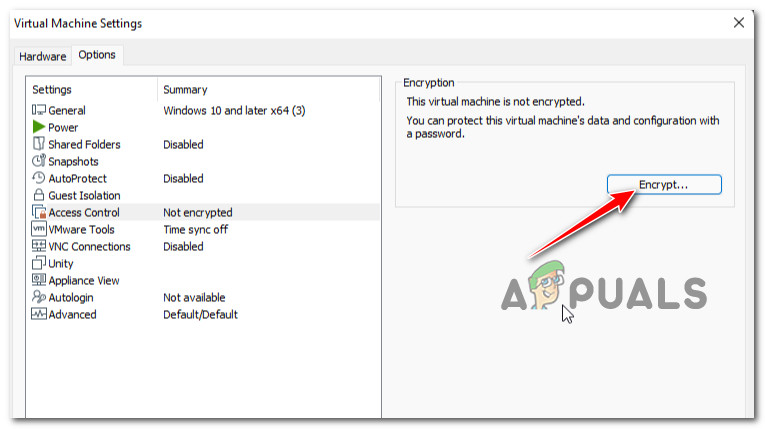
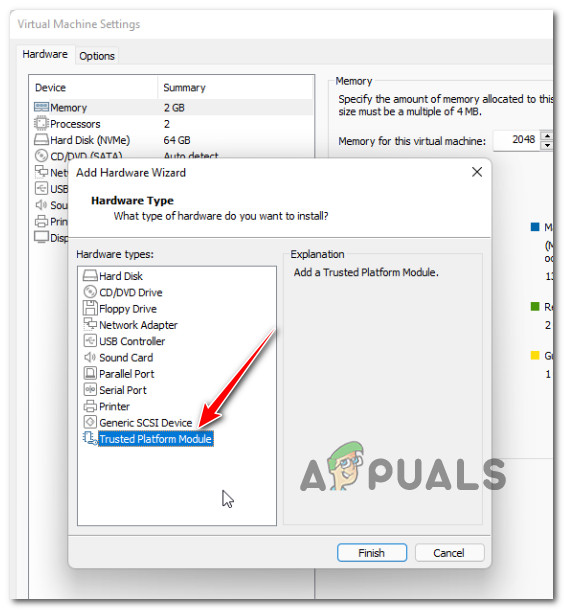
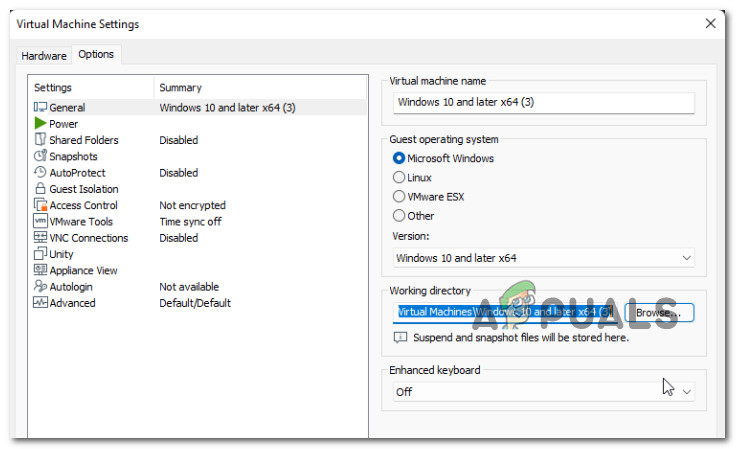
The most typical cause of this problem is that your system supports Secure Boot and TPM 2.0, yet the two capabilities are deactivated in VMware Workstation’s Virtual Machine settings. Simply enable secure boot from the Fireware section and Trusted Platform Module from the Trusted Platform Module to resolve this issue. You can repair the error by encrypting your virtual machine and then adding a virtual Trusted Platform Module (TPM) if you use VMware Workstation Pro. Important: If you’re using VMware Workstation Player, move on to the next technique, which involves a registry hack and modifying the .vmx file. The instructions below we’re only tested on VMware Workstation Pro. To encrypt and add TPM to your virtual system, follow these steps: If the problem is still not fixed, move down to the next method below.
3. Edit the VMX File to Add VTPM
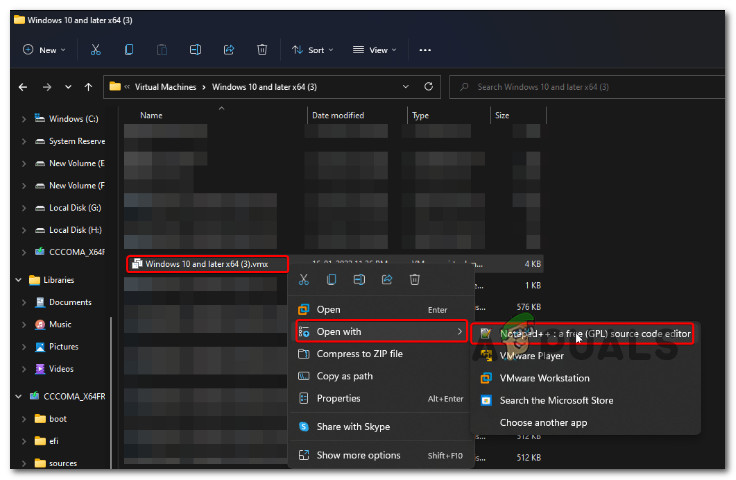
A scenario in which the VTPM file is not correctly set to accept a Windows 11 virtual machine is another reason you can encounter this problem. In this situation, you can resolve the problem by modifying the VMX file to verify that VTPM is installed in VMware Workstation. Editing your virtual machine’s .vmx file and adding the VTPM is the simplest solution to fix the PC can’t run Windows 11 issue (Virtual Trusted Platform Module). This solution works with all VMware Workstation versions, including Pro, Player, and Fusion. To make use of the software feature by altering the .vmx file, follow these steps: If the problem is still not resolved, move to the final potential fix below.
4. Bypass TPM Check for VMware via Registry Editor
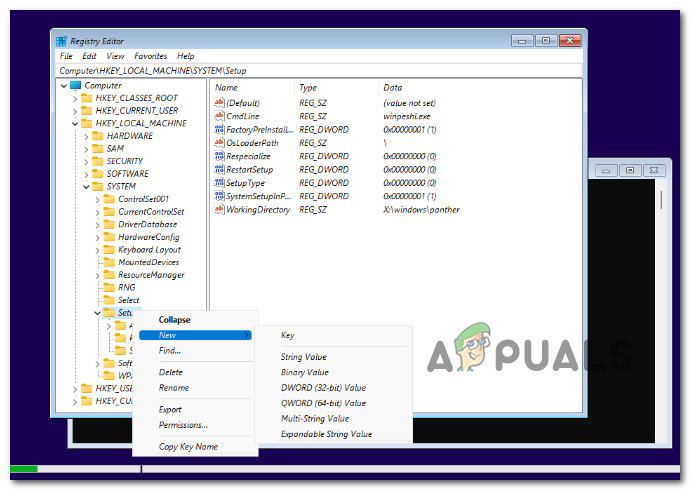
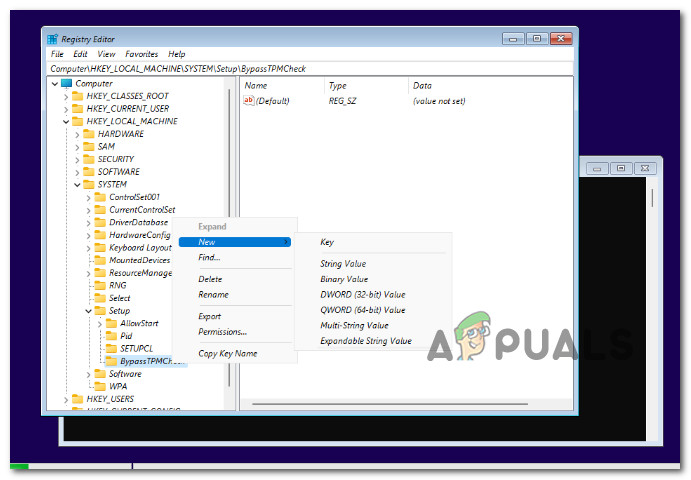
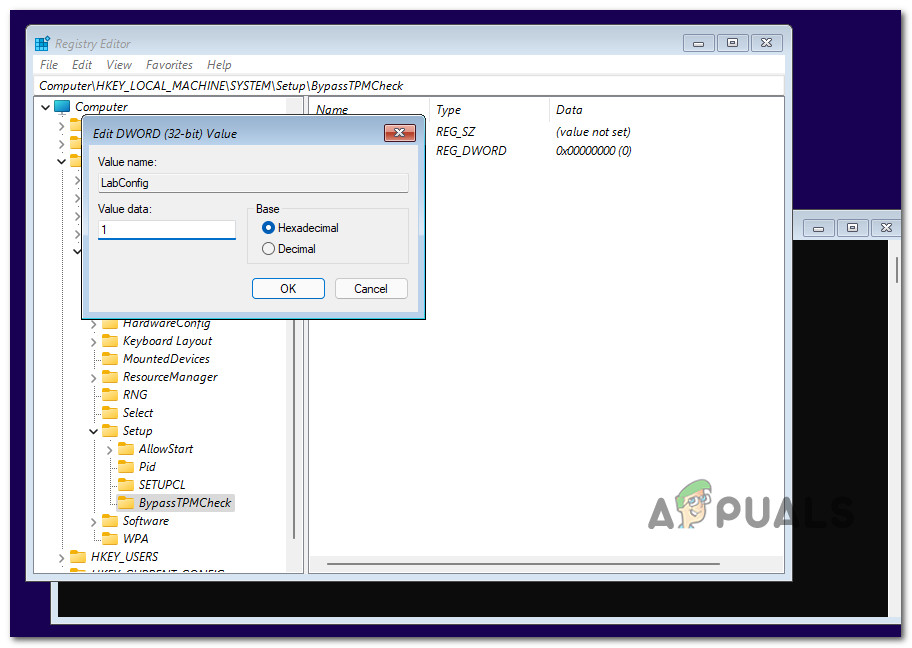
If you meet all of the other requirements except the TPM check, you may easily bypass it by changing a Registry entry that is responsible for executing a TPM check inside VMware Workstation. To resolve this issue, you’ll need to use an elevated Command prompt to make certain changes. Another option for resolving this issue is to edit the Windows registry and add new entries. It will assist you in overcoming the VMware Workstation minimum system requirement error. When the system requirement notification displays on your screen, this approach entails editing and inserting a registry item. Here’s how to do this:
Windows 10 20H1 2004 Blocked By Windows Security App? Here’s A Solution To…Can’t Install Apps Error on Windows Store? Here’s the FIXCan’t Install Forza Horizon 5 on Windows 11? Here’s How to Fix itFix: You can’t Install Windows on a USB flash Drive Using Setup
